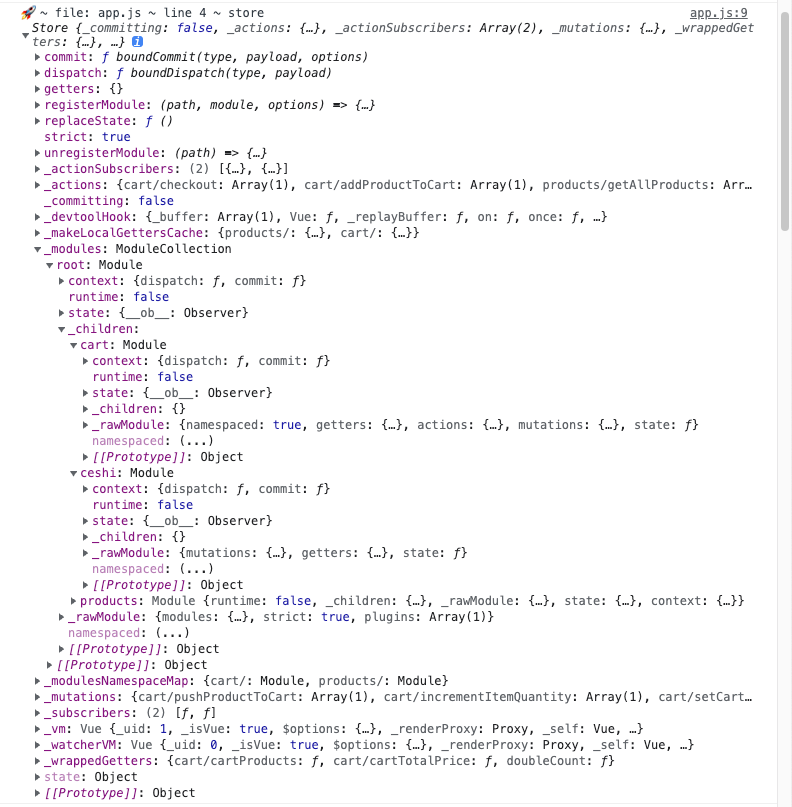
先放一张store的代码结构图
vuex初始化 Vuex 存在一个静态的 install 方法,在beforeCreate混入了vuexInit,我们只看关键逻辑
1
2
3
4
5
6
7
8
9
10
11
12
function vuexInit () { const options = this.$options // store injection if (options.store) { this.$store = typeof options.store === 'function' ? options.store() : options.store } else if (options.parent && options.parent.$store) { this.$store = options.parent.$store } }
通过声明周期函数,将store挂载到每一个组件上
Store实例化 我们把 Store 的实例化过程拆成 3 个部分,分别是
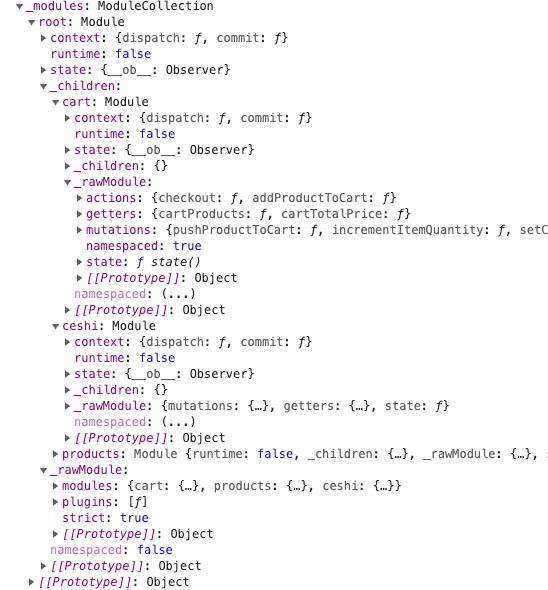
初始化模块 构建module树 其实就是处理用户输入的配置,重点在于通过module层级建立联系,如下图所示
1 this ._modules = new ModuleCollection (options)
ModuleCollection 实例化的过程就是执行了 register 方法,register方法递归遍历所有module,生成module实例,并通过_children属性与path和建立下级关系
建立关联的代码很精妙,建议结合源码回忆
安装模块 installModule(this, state, [], this._modules.root)
递归执行,它的目标就是对各个模块中的 state、getters、mutations、actions 做初始化工作
installModule 函数主要做了下述几个事情:
挂载子module state到rootState 1 2 3 4 5 6 7 f (!isRoot && !hot) { const parentState = getNestedState(rootState, path.slice(0, -1)) const moduleName = path[path.length - 1] store._withCommit(() => { Vue.set(parentState, moduleName, module.state) }) }
根据namespace配置构建module映射 为了根据命名空间快速查找到对应的module
1 2 3 if (module.namespaced) { store._modulesNamespaceMap[namespace] = module }
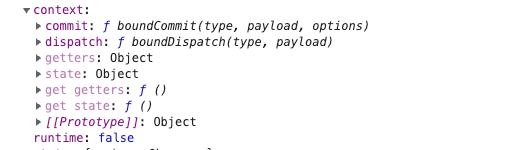
构造模块上下文环境
构造了一个模块上下文环境:保证模块内两种方法的正确运行和两种数据的正常访问
例如 模块内的dispatch(“B”) 会映射到 rootStore.dispatch(“A/B”)
注册mutation action getter 其实就是把三个属性对应用户输入挂载到rootStore上去,这里也用到了模块上下文
举一个mutation的例子
1 2 3 4 5 6 7 8 9 10 11 12 13 14 module.forEachMutation((mutation, key) => { const namespacedType = namespace + key // 在root module下 注册了 命名空间 mutation 下同 registerMutation(store, namespacedType, mutation, local) }) function registerMutation (store, type, handler, local) { const entry = store._mutations[type] || (store._mutations[type] = []) // 数组 说明 同一 type 的 _mutations 可以对应多个方法 entry.push(function wrappedMutationHandler(payload) { // store 对应模块的store handler.call(store, local.state, payload) }) }
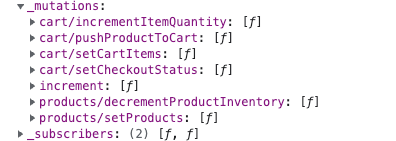
从这里就可以看出,所有的mutations都是挂载在根store的_mutations中,并且同名mutation不会覆盖,而且推入一个队列,顺序执行,下图是实际的代码
可以看出来,开启命名空间实际上就是在mutation事件名前拼接了一个路径
这个地方也解除了我对vuex官方文档一段话的不解:
1 2 3 默认情况下,模块内部的 action、mutation 和 getter 是注册在**全局命名空间**的——这样使得多个模块能够对同一 mutation 或 action 作出响应。 如果希望你的模块具有更高的封装度和复用性,你可以通过添加 `namespaced: true` 的方式使其成为带命名空间的模块。当模块被注册后,它的所有 getter、action 及 mutation 都会自动根据模块注册的路径调整命名。例如:
初始化 store._vm Store 实例化的最后一步,就是执行初始化 store._vm 的逻辑,它的入口代码是:
1 resetStoreVM (this , state)
resetStoreVM 的作用实际上是想建立 getters 和 state 的联系
利用vue的data和computed机制实现联系,关键代码如下
1 2 3 4 5 6 7 8 9 10 11 12 13 14 15 16 17 18 19 20 21 22 23 const wrappedGetters = store._wrappedGetters const computed = {} forEachValue(wrappedGetters, (fn, key) => { // use computed to leverage its lazy-caching mechanism computed[key] = () => fn(store) Object.defineProperty(store.getters, key, { get: () => store._vm[key], enumerable: true // for local getters }) }) // use a Vue instance to store the state tree // suppress warnings just in case the user has added // some funky global mixins const silent = Vue.config.silent Vue.config.silent = true store._vm = new Vue({ data: { $$state: state }, computed }) Vue.config.silent = silent